How To Construct Simple, Chunky Wooden Nightstands
For the primary time in our lives, after 4 a long time of dwelling on this planet, we’ve upgraded to a king sized mattress! We’ll get extra into whys and hows in an upcoming submit (it’s each larger and considerably decrease) and we see the plain irony of proudly owning a larger mattress in our smaller home – however let’s simply summarize it as: “the issues we do for our canine.”
You’ve additionally in all probability heard this earlier than, however typically the best way to really feel such as you’re dwelling giant in a smaller area is with fewer bigger furnishings items (versus a bunch of small dollhouse-scaled furnishings). There’s such a luxurious to having a pleasant lengthy 90″ couch upstairs, an enormous 72″ desk that seats as much as 8 individuals within the kitchen, and actually, it has been superb to have such an enormous mattress. Like, two individuals who by no means cared a couple of king mattress now actively wax poetic about it every single day, and our whole household repeatedly piles in to learn or hang around on lazy weekends.
The improve did include one tradeout. Upgrading to a bigger mattress meant we needed to swap our bigger facet tables out for smaller ones that *completely* match the area.
Fortunately we don’t actually retailer very a lot in our facet tables (so long as there’s room for a lamp, some books, and a glass of water we’re good). So yeah, maximizing the scale of the factor you actively calm down on and sleep on was a good commerce for minimizing our facet tables.
And right this moment, we’re sharing how we whipped up these customized nightstands (you may make them any measurement you’d like to suit your room like a glove!) with a considerably uncommon materials. Nope, it’s not scrap wooden or two-by-fours (or pallets – bear in mind all these furnishings tutorials?). We really used a butcher block countertop to make these two chunky strong wooden facet tables.
Why Construct Customized Nightstands?
By now you realize that our outdated bedside tables now not match alongside the wall with our new king sized mattress in place, however why not simply purchase one thing already made? We realized that with a purpose to maximize the room with a much bigger mattress, it could be sensible to shift it barely off-center on this wall. It’s solely by a few inches (and never tremendous noticeable – particularly as a consequence of a secret about our bed room that we reveal within the video under this image), however that slight shift makes it a lot simpler to entry our closets that are each positioned on this facet of the mattress.
Shifting the mattress a number of inches off-center meant that my facet might accommodate a barely bigger nightstand than Sherry’s. And earlier than I sound just like the dangerous husband for claiming the “larger” facet, Sherry’s facet really has extra strolling area as a consequence of that aforementioned secret that’s revealed within the video under. So yeah, watch that and tell us when you ever seen that our room does that – as a result of we hear that most individuals who’ve adopted alongside for years had no concept!
A Fast Bed room Tour On Video
To not spoil the ending or something, however a variety of this can make extra sense when you watch this quick video Sherry shot of the completed nightstands. In it you’ll see:
- Why we wanted two differently-sized nightstands
- How we maintained room for the closets to open
- What the wall of the bed room does on Sherry’s facet of the mattress
- What we retailer behind the closet door that’s absolutely blocked by the nightstand
- One facet desk modification we thought of (if you need much more storage, we have now a fast tip for you on this video)
Plus you’ll get a sneak peek of how that entire again wall of our bed room is shaping up with the brand new mattress!
Be aware: You may as well watch this video on YouTube.
Weighing Our Choices (& Saving Cash)
Lengthy story lengthy: this barely asymmetrical state of affairs left us with a number of choices for getting new nightstands:
- Discovering matching nightstands that (miraculously) got here in two barely completely different sizes
- Embracing that non-matching nightstand look
- Getting two smaller nightstands, and leaving just a little hole on my facet
- Construct our personal!
The entire choices had potential (apart from perhaps #1) and since our desired measurements have been fairly particular, we determined to make our personal.
Plus, like many DIY choices, we realized we might save ourselves fairly a bit of cash in comparison with a number of the nightstands we have been discovering on-line. We knew we needed one thing with clear traces and a contemporary chunky wooden look – and most of the storebought choices have been surprisingly dear… particularly if we had to purchase two!
The excellent news is that our last value for BOTH nightstands was simply $310 – which was the price of the butcher block counter we purchased and the oil we used to seal it. Which means every one breaks all the way down to about $155 for a brilliant substantial strong wooden nightstand. Not dangerous!
Supplies & Instruments Wanted
We knew this butcher block material can be nice for recreating the look we needed. We’ve used it elsewhere in our home, most just lately in our utility closet in addition to to high some Ikea cupboards in our bed room (submit coming quickly) and we find it irresistible as a result of the thickness can actually elevate a store-bought cubby or an Ikea cupboard. Plus we already knew the colour seems to be nice with our flooring. However when you’d quite use one thing apart from butcher block, you may nonetheless comply with the identical approach with any wooden of your selection.
Step 1: Plan Your Construct
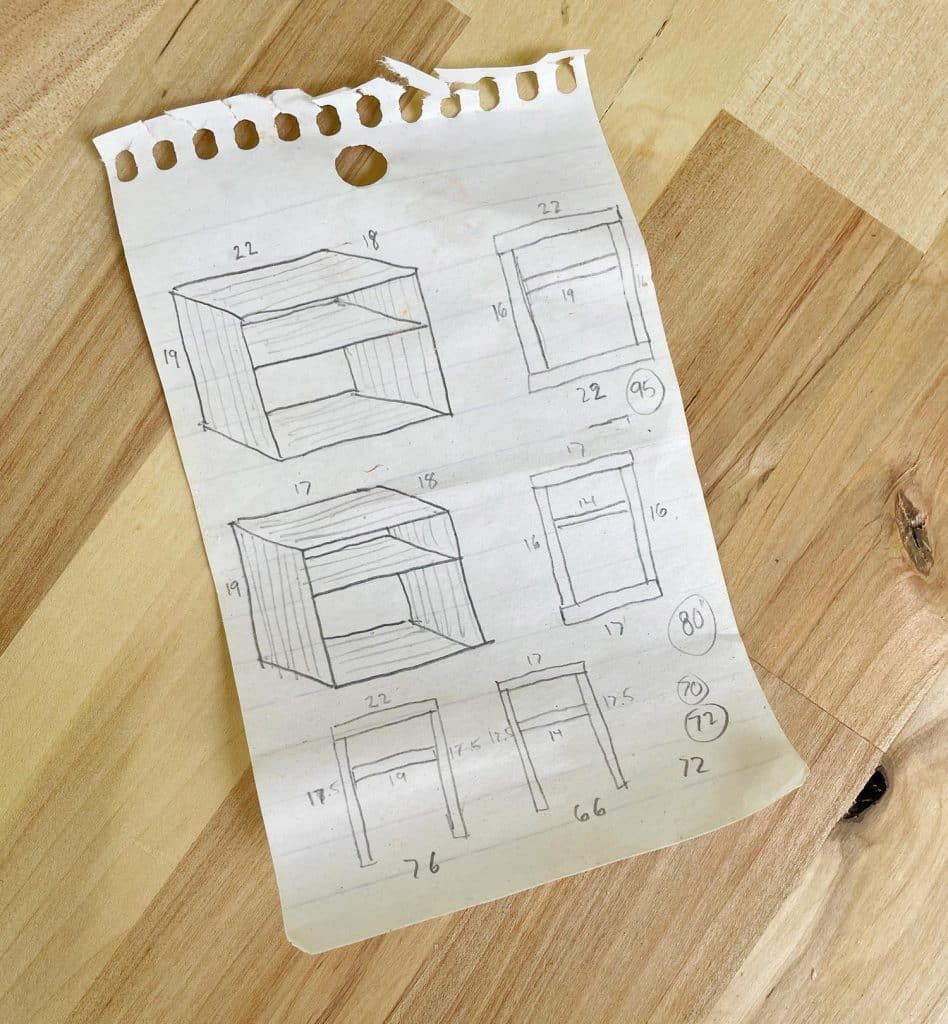
Despite the fact that the butcher block slabs are cheaper than these store-bought nightstands (the island measurement, 72″ x 39″, is $300) it’s nonetheless dear, so we actually needed to get TWO nightstands out of ONE piece of wooden. So Sherry and I sketched out a number of choices, crunched some measurements, and got here up with a design that 1) we have been enthusiastic about and a couple of) didn’t waste wooden.
You’ll be able to see from my tough drawings above that we debated a blocky “8” design with three horizontal surfaces (extra on that within the video we shared above) however we in the end scrapped the underside shelf (leaving it extra like a blocky “A” as an alternative) as a result of it could hold the nightstands lighter and it actually didn’t really feel mandatory (we didn’t want area for a basket or a folded blanket or one thing that might fill that bigger cubby it could have created). Bonus, it’s simpler to wash underneath for Eufy to wash underneath!
Step 2: Minimize Your Butcher Block To Dimension
The cautious planning and measuring gave us a transparent plan for the scale of every piece that we wanted to chop. So first, utilizing a circular saw, we minimize the butcher block island twice down the middle space to offer us two 18″ huge slabs. Every slab would grow to be one, 18″ deep nightstand. Alternatively, you possibly can minimize it precisely in half, one time (which would depart you with two 19.5″ slabs) however that might’ve made our nightstands too deep as a result of it could have blocked entry to my closet door.
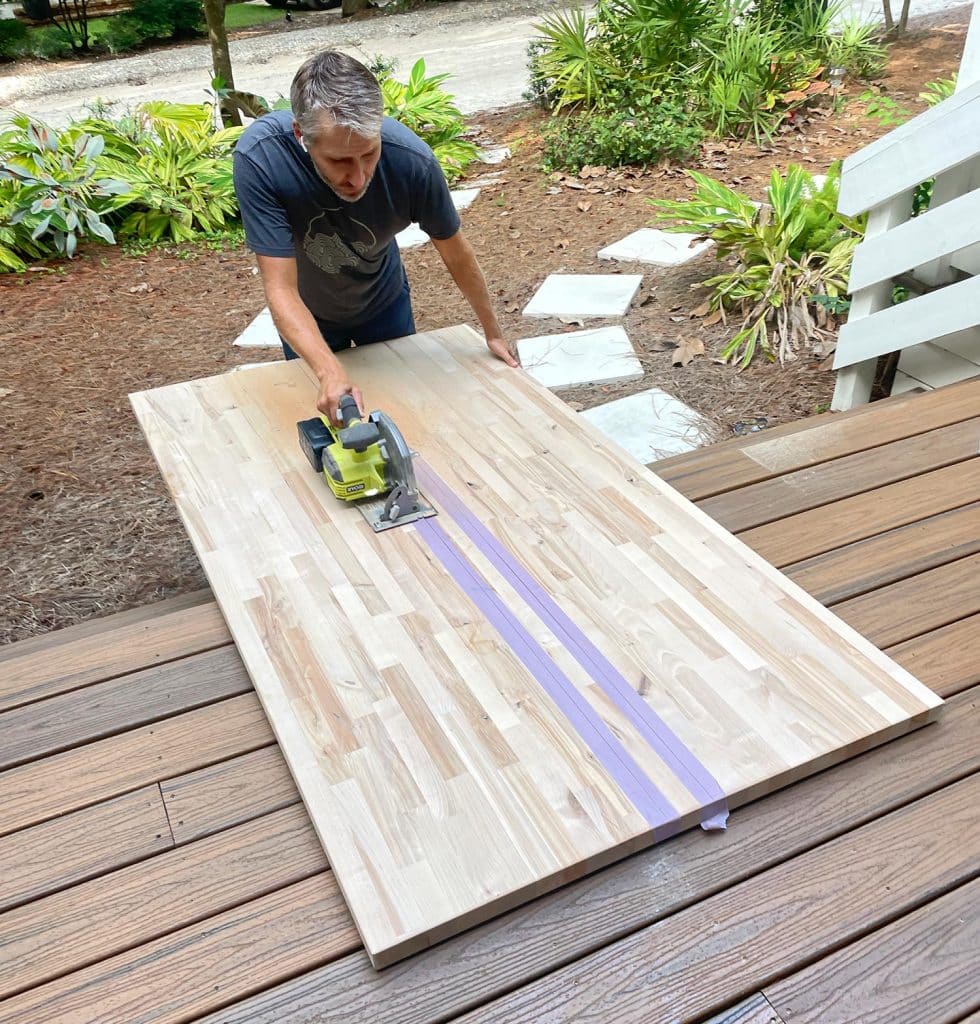
I notice my entrance porch “workshop” leaves one thing to be desired, nevertheless it will get the job accomplished. Additionally: put on security goggles. I acquired them on proper after that shot above (see the image under). And as for engaged on our entrance porch, it’s really a pleasant flat floor that I can unfold out on. And don’t fear, I ensure that we by no means minimize the highest of the particular decking. We spin the piece round to complete our cuts so the blade is all the time hanging over the step (such as you see under).
As soon as I minimize my two 18″ slabs, I measured fastidiously and minimize every into the 4 items wanted for every nightstand: 1 high, 2 sides/legs, and 1 shelf. Though, really, I waited to make my last shelf cuts till the opposite 3 items have been assembled. That method I might double-check my measurement one final time for a good match.
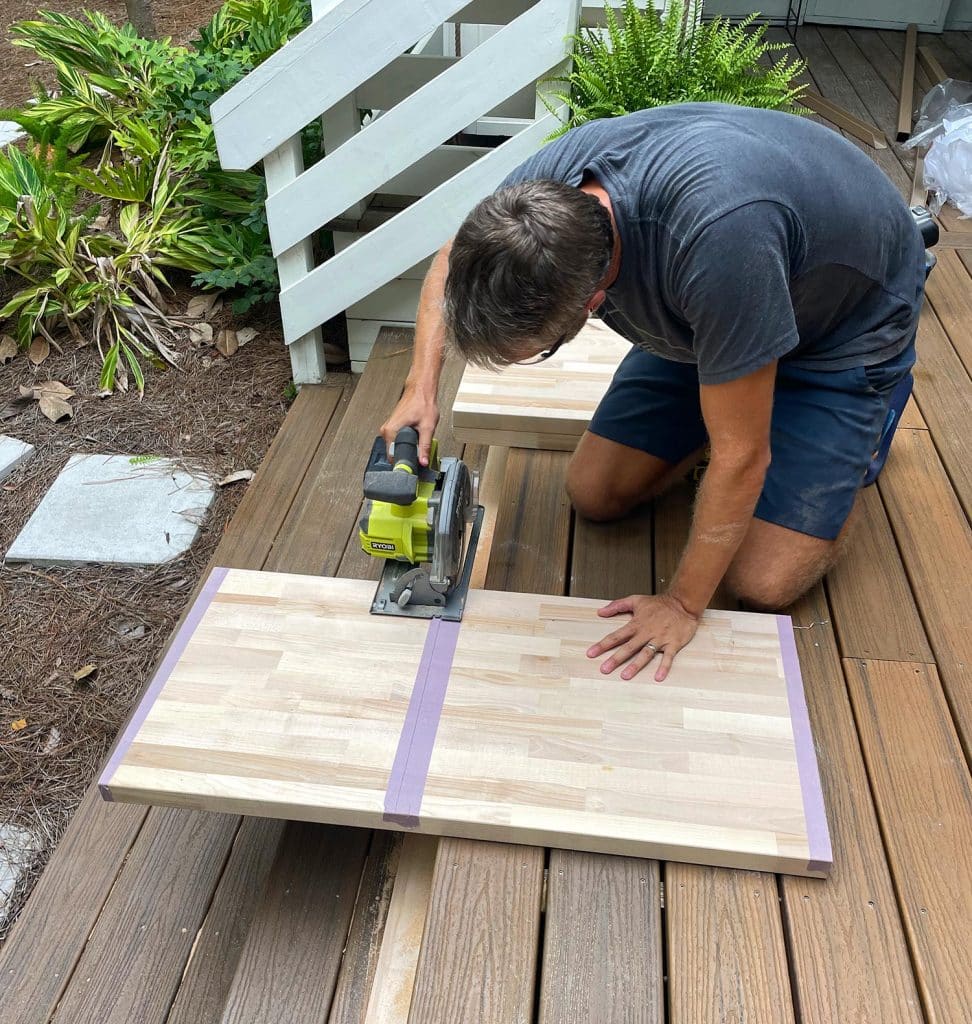
You’ll additionally discover we use painters tape on every of our round noticed cuts. This not solely offers me a floor to attract a straight line on (with out marking up the precise wooden) nevertheless it additionally will help you make a smoother minimize with much less chipping and splintering. Additionally, I’ve tried a few round noticed guides (like this one) and discover that I do higher free-handing my cuts – however they’re an possibility for you if you wish to give them a strive.
Step 2: Mark Your Items
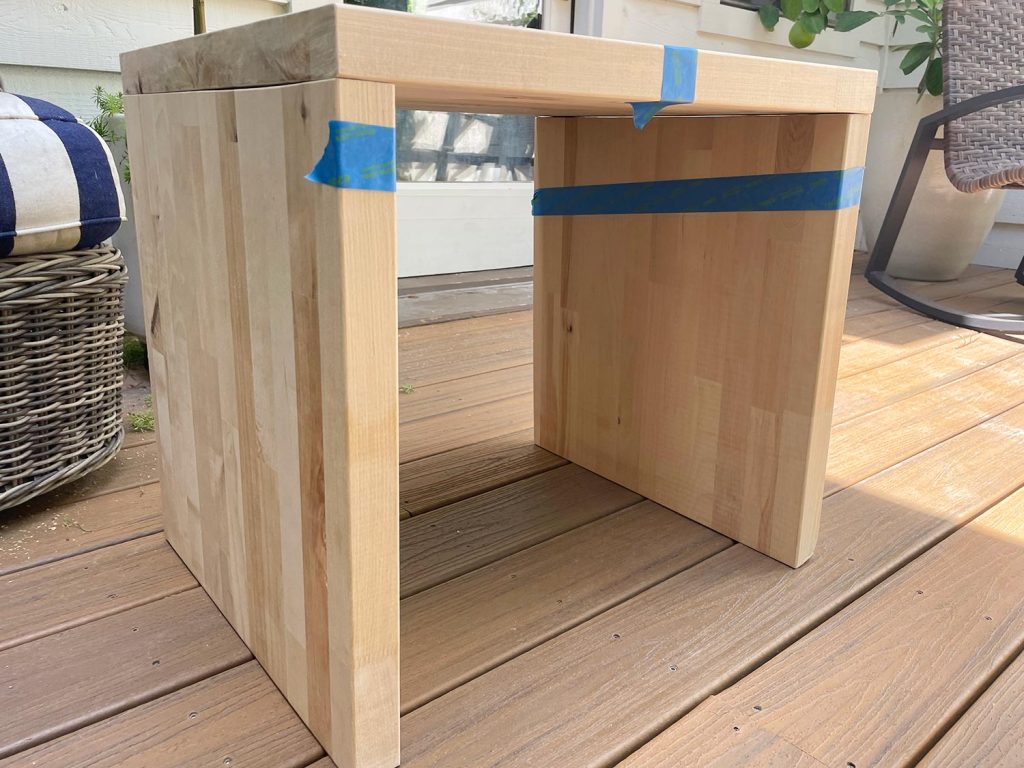
After my cuts have been made, we roughly balanced the tops on every set of legs to verify our progress. We additionally used this step to resolve which elements we needed to point out – like what facet of every piece of butcher block seemed the most effective, had the fewest knots, and so on.
As soon as we decided our format, we used painter’s tape to loosely mark the orientation of every piece. The lengthy items alongside the within of every facet piece have been particularly useful to remind us as soon as we proceeded to the subsequent step: drilling our pocket holes.
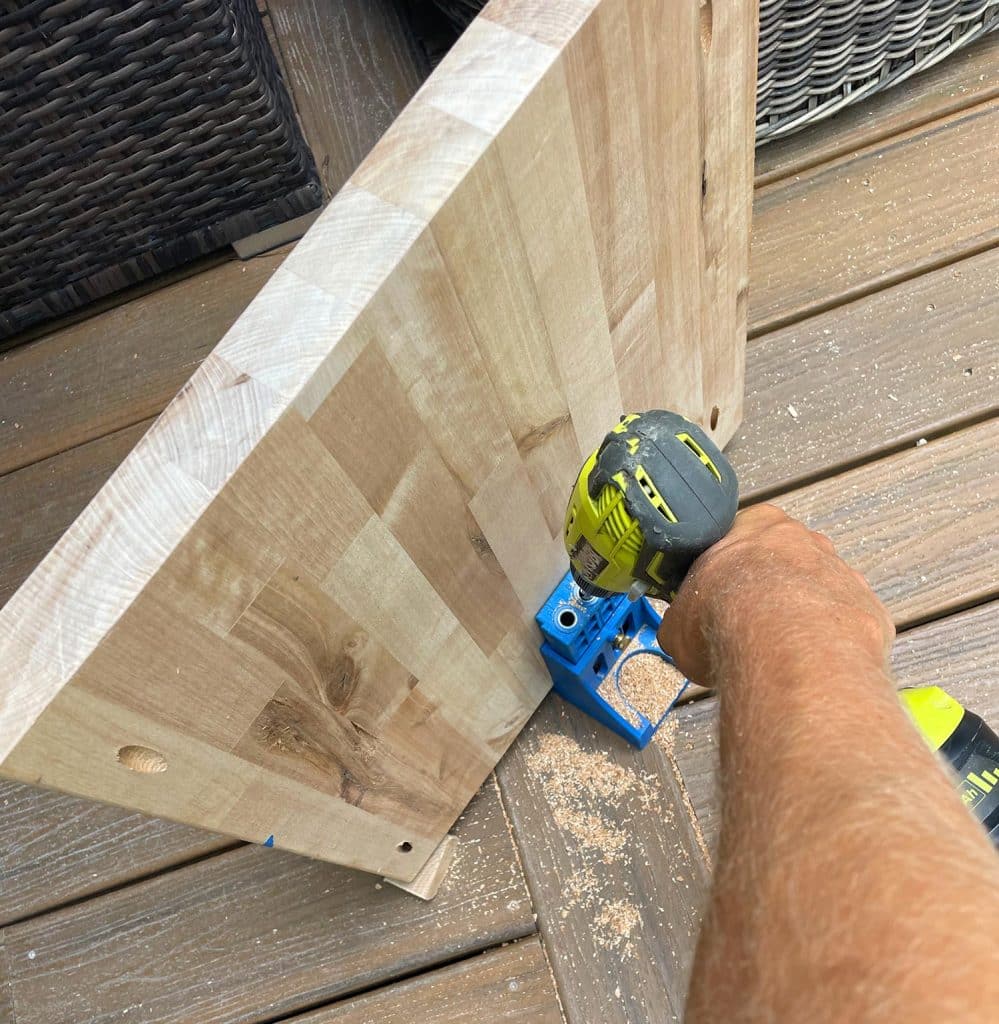
Step 3: Drill Pocket Holes In The Legs
To connect the facet items to the highest piece, we needed to screw up from the within of every leg into the highest – that method we wouldn’t have any seen holes on the highest of the nightstand. To do that, we used our Kreg Jig to drill three pocket holes on the within of every leg (that is the place our tape markings helped remind us the place to drill). Right here’s the place you may study extra about use a Kreg Jig. It’s an MVP device we’ve had for over 12 years!
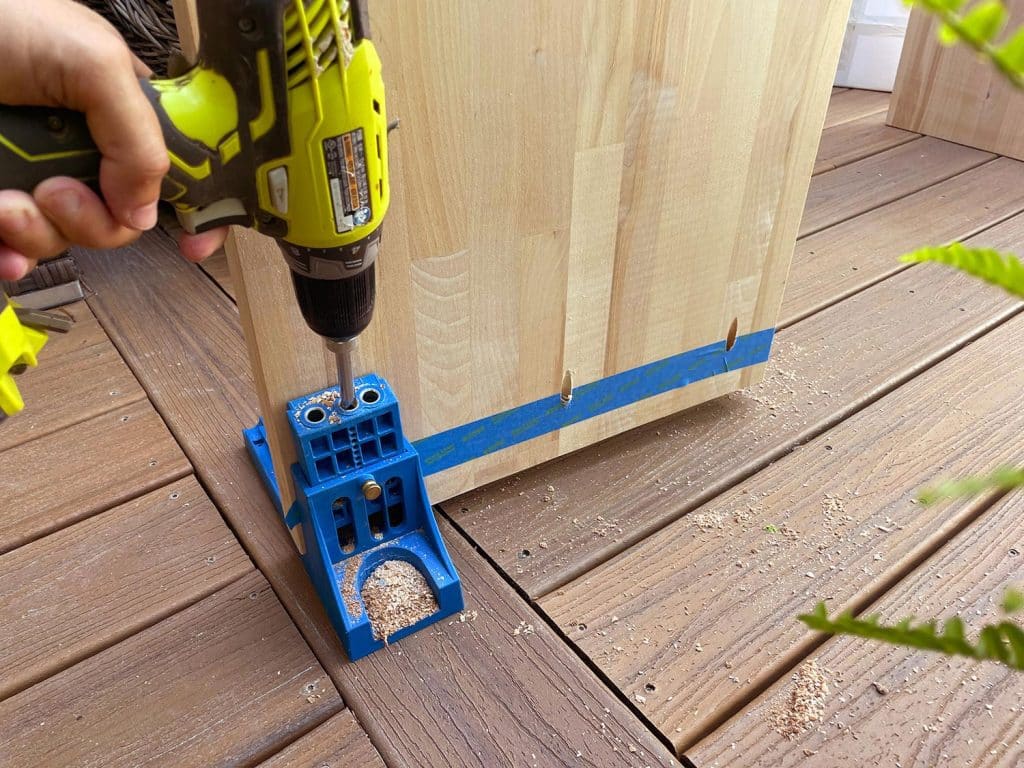
I drilled all the pocket holes for the legs in a single step because it saved me from switching out my drillbit forwards and backwards for the subsequent step.
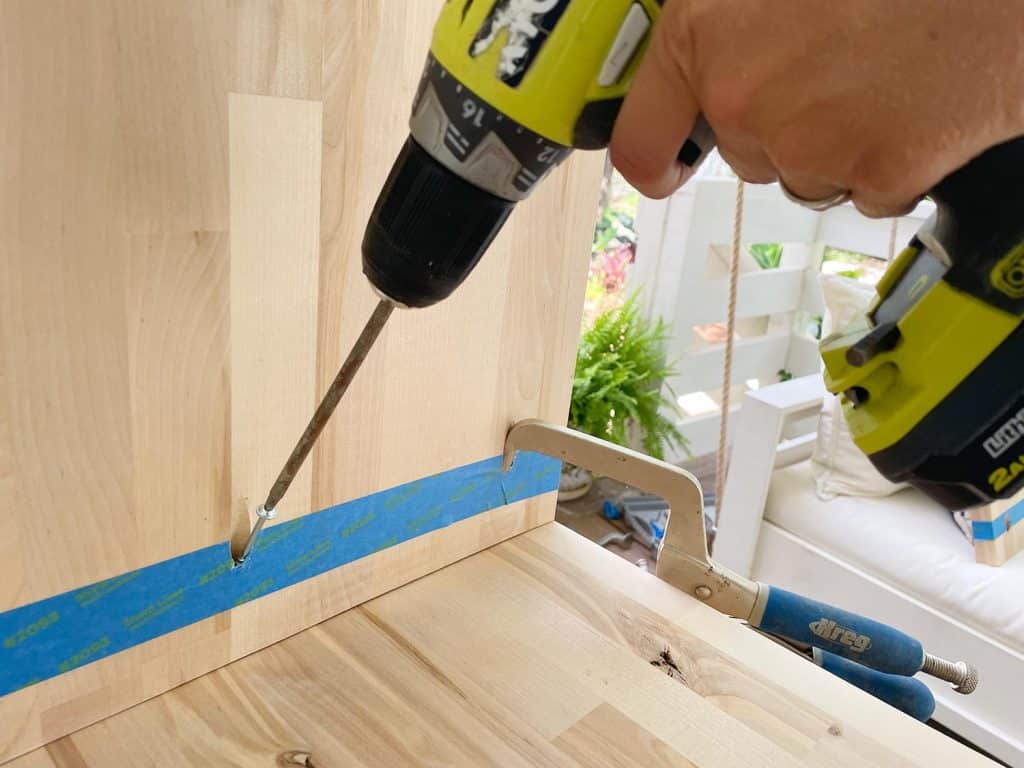
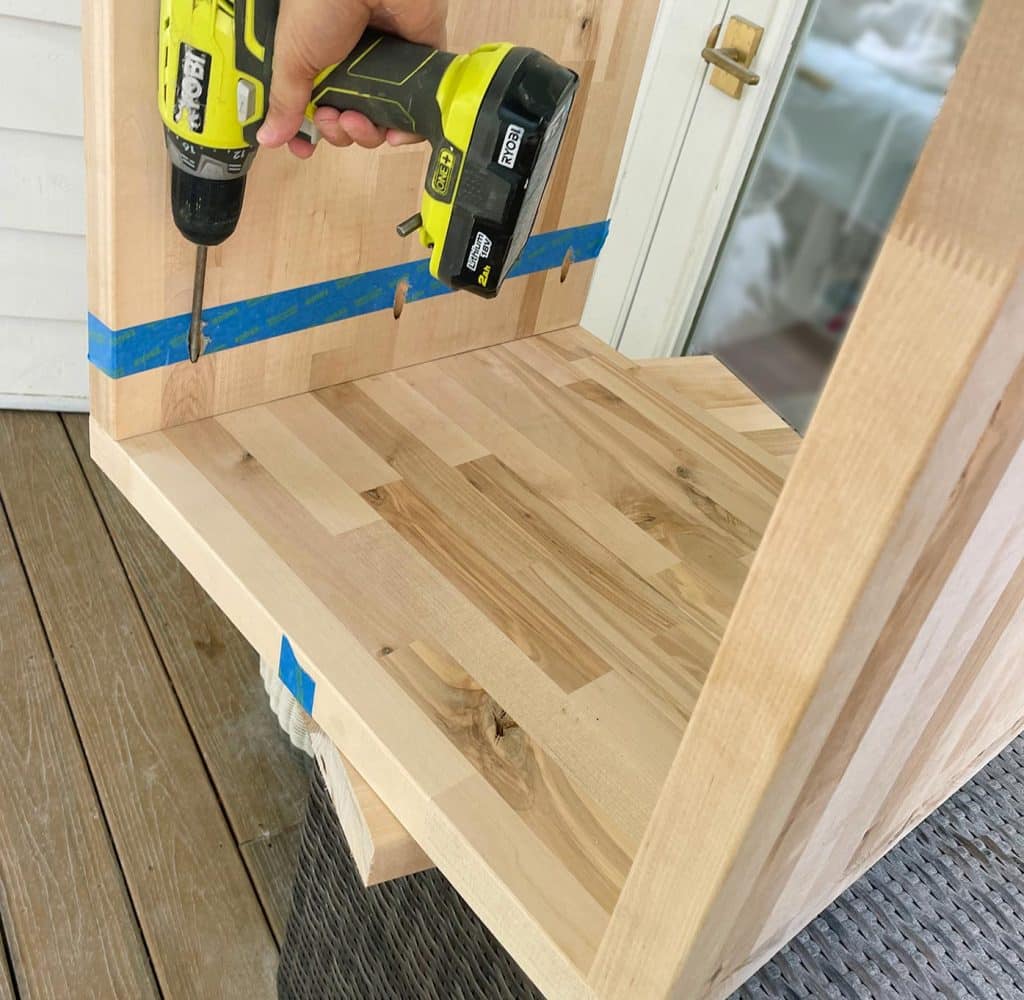
Step 4: Clamp & Screw The Legs To The High
With our pocket holes drilled into every leg, we turned the highest piece the wrong way up and clamped one leg in place utilizing this clamp designed particularly for pocket holes. This helps hold it exactly in place whilst you drill, so that you don’t have any last-minute shifting.
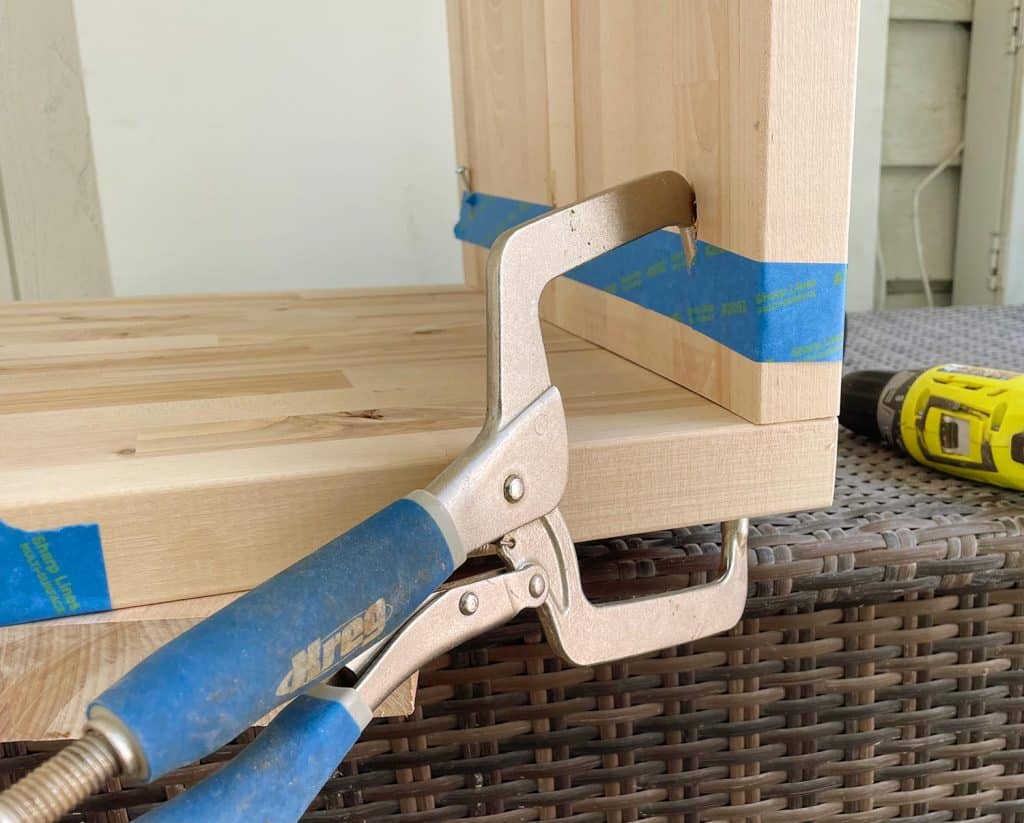
With one finish securely clamped, we fastidiously screwed via the opposite open holes utilizing 2″ pocket hole screws. As soon as these have been secured, we eliminated the clamp and screwed via the final pocket gap.
Then we simply repeated the method on the opposite leg, after which once more for each legs of the second nightstand.
Step 5: Repeat This Course of For The Cabinets
With the highest and sides connected, we measured the exact size for every shelf and made our last cuts utilizing our round noticed. Then, we broke out our Kreg Jig once more to create three units of pocket holes on BOTH ends of every shelf piece (being certain to drill them on the underside).
Subsequent, to connect every shelf, we laid every nightstand on its again and set the cabinets in place (we had minimize them to be such a good match they principally held themselves upright). Lastly, we screwed them collectively similar to we had accomplished earlier than.
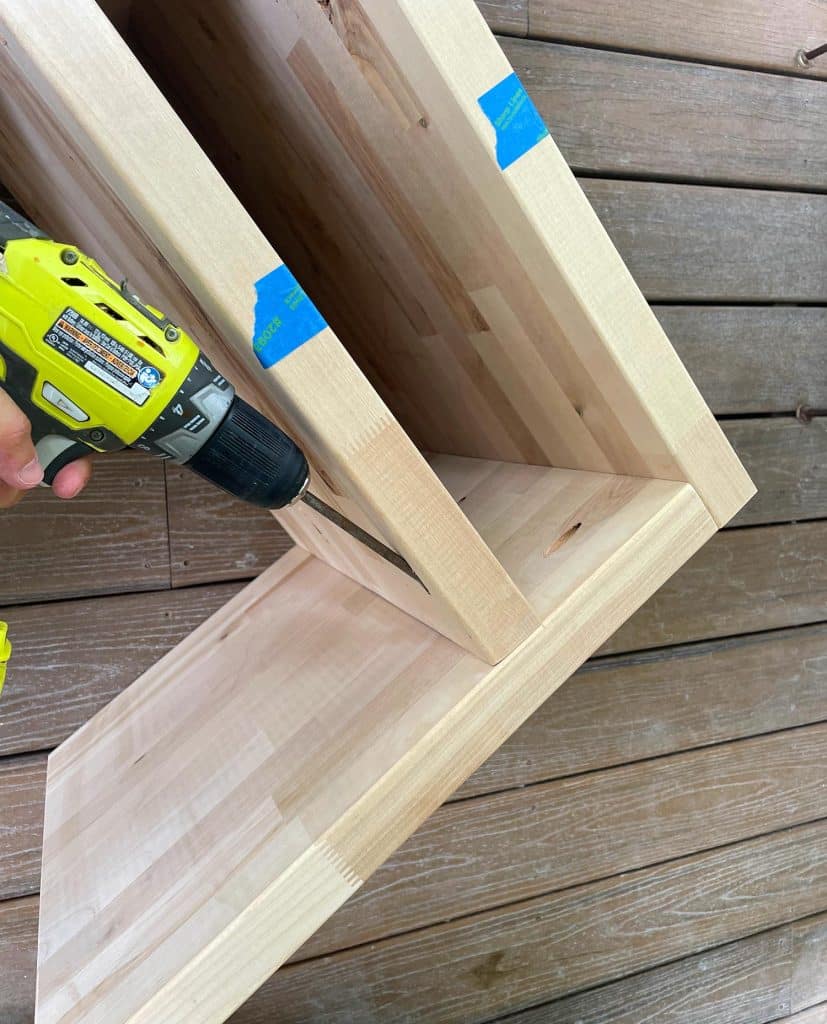
We selected a 5″ hole for our shelf, nevertheless it’s actually as much as you. We had tried one thing just a little larger at first nevertheless it nearly seemed like we had mismeasured the midway mark when standing above it and looking out down (watch out for these perspective-related optical-illusions!). So the smaller 5″ spacing made the shelf look extra deliberately positioned in direction of the highest of the desk, which we actually preferred in regards to the form of desk #4 under:
Plus, it’s turned out to be tremendous purposeful for us! Look what number of books it could actually nonetheless maintain!
Step 6: Sand The Edges
To ensure all the edges, particularly the minimize ones, weren’t too sharp – we gave all the uncovered corners and edges a fast sanding with some medium- after which high-grit sandpaper, simply to spherical them off ever so barely. That method if we bump in opposition to these or attain over haphazardly within the evening, we’re not gonna slice ourselves open on some uncooked fringe of wooden.
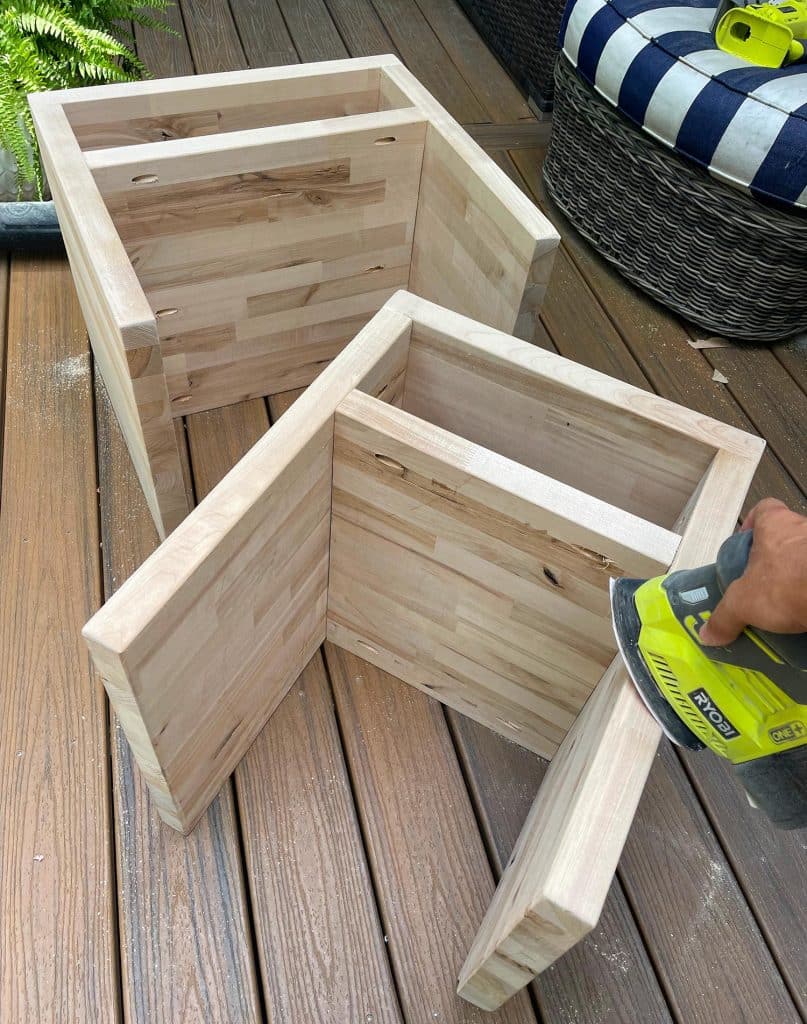
Simply be sure you totally wipe down or blow off any sanding mud earlier than continuing to the subsequent step.
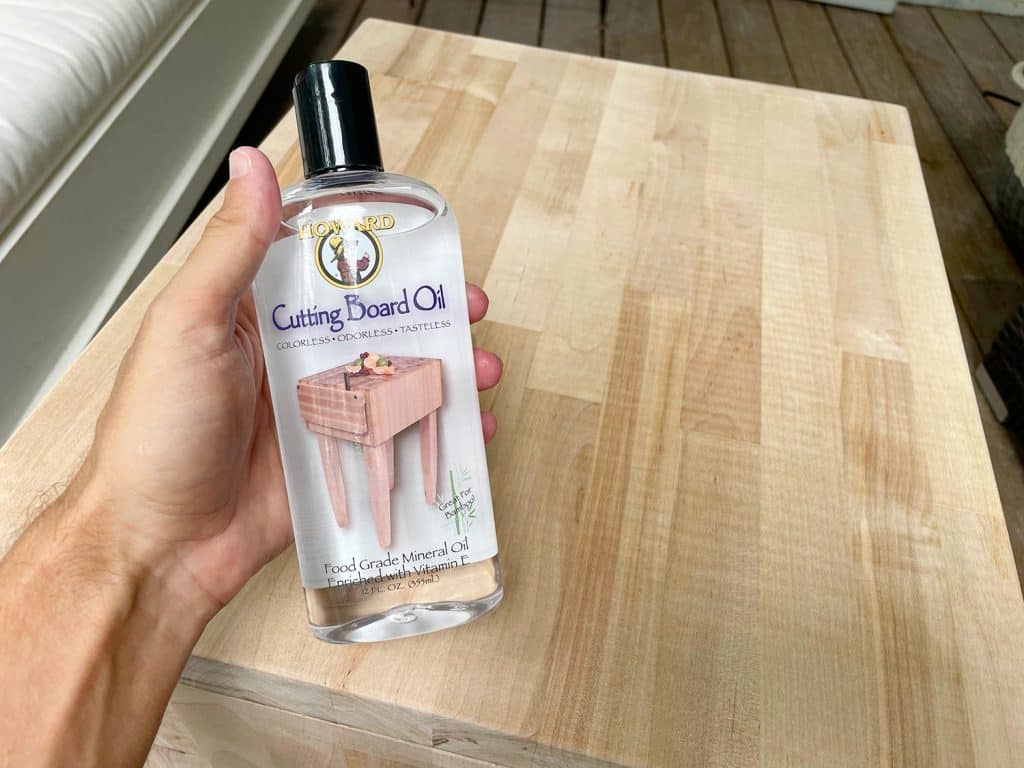
Step 7: Seal The Butcher Block With Oil
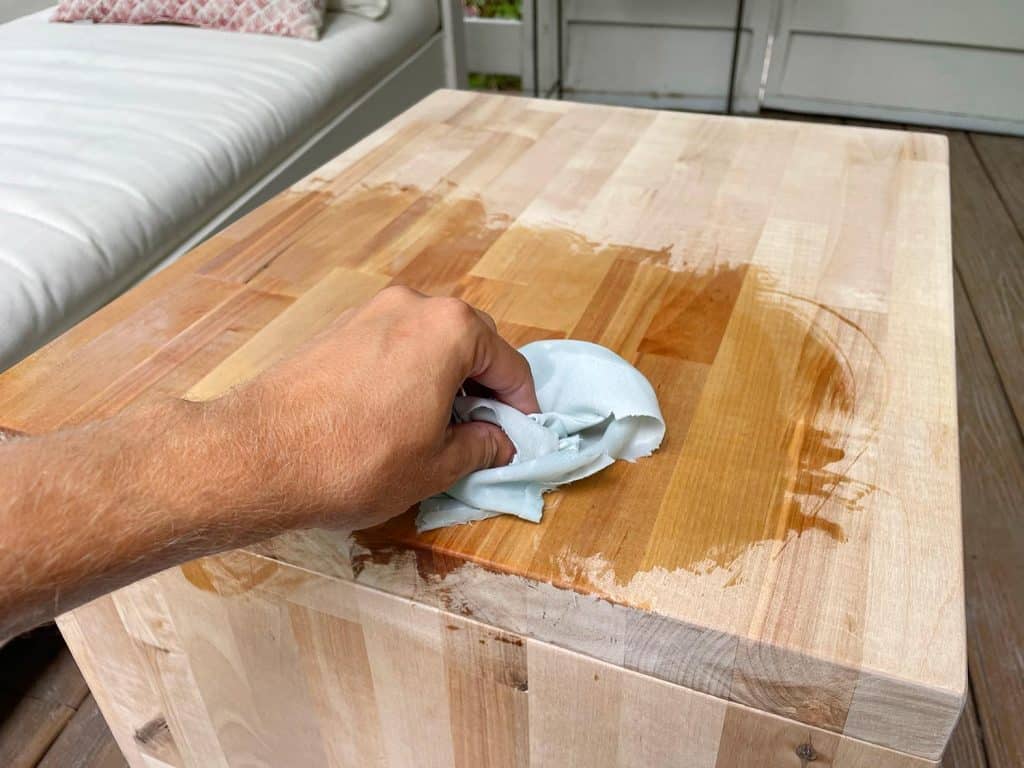
We’ve discovered our favourite option to end off this butcher block is with a single coat of Cutting Board Oil. It darkens the wooden a bit and brings out the grain properly, whereas additionally sealing it. It’s extraordinarily straightforward to use.
We sometimes pour a small puddle instantly on the butcher block after which wipe it round with a rag or paper towel till it has all soaked in. It undoubtedly lightens up just a little bit because it dries, so don’t be too alarmed if it feels a lot darker than the wooden you’d simply been gazing moments earlier than.
And naturally, when you’d like a extra particular colour you may all the time apply stain or sealer as an alternative.
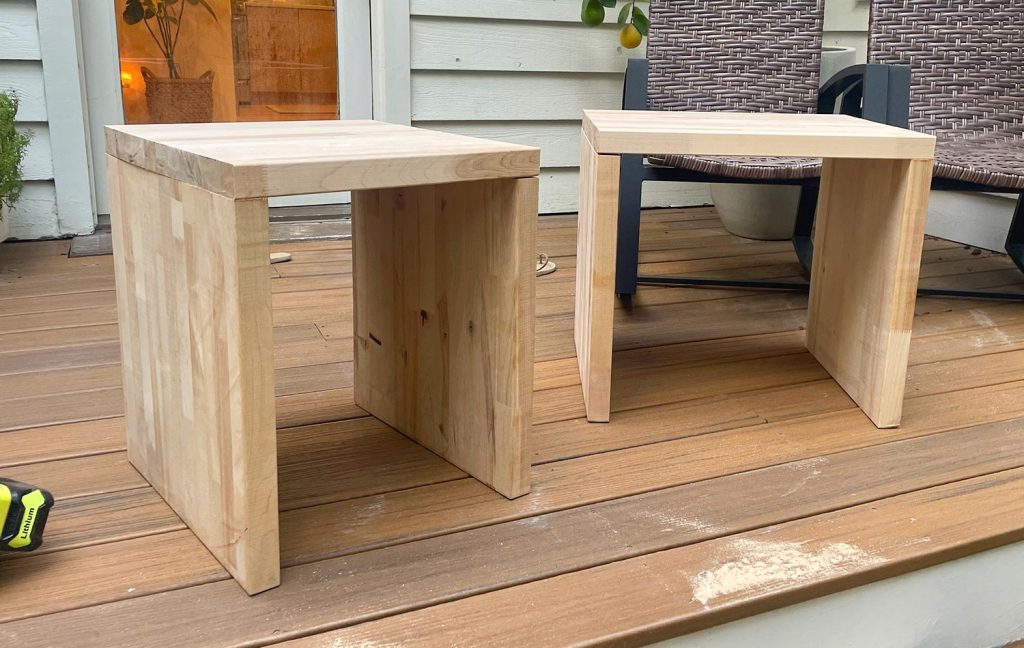
Step 8: Let Dry & You’re Achieved!
We gave our nightstands a couple of day to dry earlier than placing them in place, and we’re actually proud of how they turned out!
They match completely on both sides of our mattress, simply as we had deliberate, whereas additionally giving us extra perform than we initially thought we’d get. It’s because at one level Sherry had deliberate on simply utilizing a backyard stool as her facet desk, so having a whole cubby for books and the sound machine is an actual coup. Sure, that’s how right into a king mattress we have now now grow to be. She was keen to make use of a backyard stool as her nightstand with out hesitation.
We’ve thought of storing issues beneath – like a basket or one thing we are able to slide out and in – however each time we’ve put something down there it simply seems to be unnecessarily cluttered and we don’t want the area. So until we really want to retailer one thing there down the road, we’re blissful to go away it empty. Plus, it truly is a sight to see our robot vacuum fortunately spinning round to get every nook in there.
My nightstand is 22″ huge, so it has given me loads of floor area for books, chargers, a lamp, our Alexa, and even a plant. In actual fact, it normally has extra on right here (like a water bottle, baseball cap, or a rogue Skittles wrapper) however I attempted to be much less of an animal for these photos.
Sherry’s is certainly a bit narrower at simply 19″, however she discovered this small woven storage basket that wrangles all of her bedside stuff – contact lenses, chapstick, nail clippers, and what I assume is a big assortment of poems professing her love for me. (What?! They’re her blue mild glasses? OK high quality.)
Sherry’s facet could look cramped in these images, however when you watch the video you’ll see that she’s acquired loads of area to maneuver round due to that *particular* wall in our bed room.
We’re planning a bigger bed room replace submit that’ll have extra data about why we determined to improve our mattress, together with some further closet area we’re about to earn (simply ready till that’s full to take images & share how the entire room has formed up). Additionally when you thought to your self “that mattress wall is perhaps good with some extra colour or texture on it” – we’ve had the identical thought, so keep tuned…
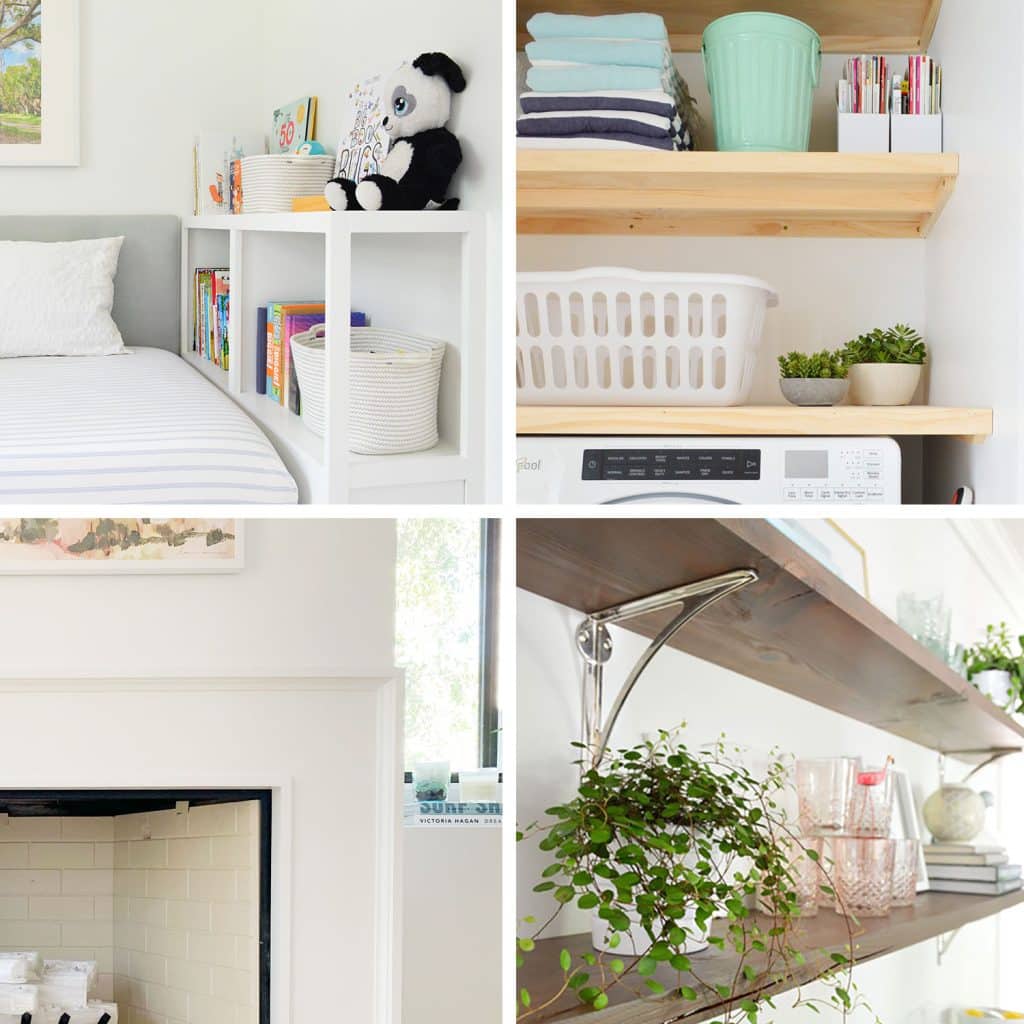
Extra DIY Constructing Tasks
Listed below are another DIY furnishings tasks and straightforward builds you is perhaps excited about – particularly when you’re trying so as to add some further wooden storage.
*This submit comprises affiliate hyperlinks, so we could earn a small fee once you make a purchase order via hyperlinks on our website at no further value to you.